Today, in our suburban areas, constructions that can not be called functional are not rare. What is their purpose? It turns out that our compatriots are increasingly coming to the country to relax, and not in order to change one type of work for another. But for a good rest you need something to please the eye. For example, an elegant arbor, an artificial pond with fish, a fabulously beautiful flowerbed, a Russian bathhouse, or at least a carved bench. One of the most popular products among gardeners is a do-it-yourself mill for a garden made of wood.
Before proceeding with the manufacture of a decorative wooden windmill, we conditionally divide its design into three parts: a platform, a frame, and a roof. To facilitate the workflow, you can separately make each of these parts, and then simply assemble the structure together. So we will do.

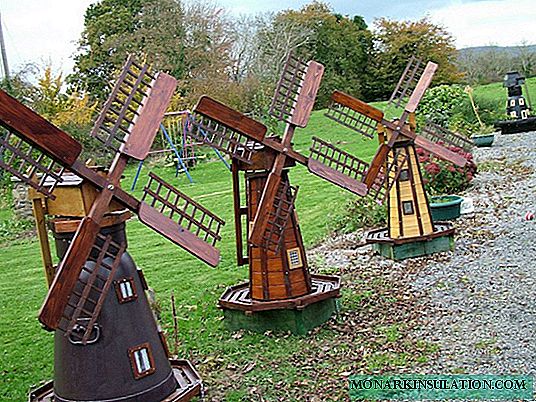
These wooden mills are a real work of art: how much labor and diligence is invested in their creation. Surely you will want to do something similar. Choose your model
Stage # 1 - installation of the base platform
The platform is the lower part of the mill, its base. It must be strong and stable enough to support the weight of the entire product. Installation of the lower part must begin with the creation of a square frame 60x60 cm in size. For these purposes we use a board 15-20 cm wide, about 2 cm thick. A 20 mm cladding board, which is often called a "clapboard", is ideal for such work.

This base is made in the form of a log house. The photo clearly shows how exactly it is necessary to make a selection in shank cuttings from which this original design is made
The parameters of the platform must be periodically checked by measuring the diagonal distance with a tape measure. A properly constructed base without distortions will allow the entire product to be durable and reliable.
A decorative mill will be installed on a lawn or ground, which will inevitably lead to contact of wood with moist soil. To avoid rotting, you can install it on the legs, previously isolated from unwanted contacts. Excellent insulation for the legs can be made of PVC pipe. We select a pipe with a suitable diameter and cut pieces of 20 cm from it.
Now we need four bars that fit tightly into the pipe sections. We fasten the segments with pieces of timber using self-tapping screws. We fix the finished legs to the four inner corners of the platform. It is necessary to check the level so that the legs are the same length from the beginning of the platform to the ground.

And in these photographs it is precisely the construction whose construction we are describing. By the way, instead of PVC pipes, you can use your old car tire under the mill base
It remains to close the lower part of the structure from above with boards, carefully fitting them one to the other. It is best to fasten the structure with self-tapping screws. The resulting platform should look like a stool. Do not forget about the need for ventilation of the structure. For this purpose, you can drill a dozen holes in a horizontal platform. By the way, they are also useful for removing water from the structure, which inevitably accumulates after rain.
Another option for the construction of the platform is an imitation of a log house. As a material for it, cuttings for shovels are perfect. You can make such a "log house" with four walls, but five walls will look more effective.
Stage # 2 - frame and roof manufacturing
We will construct the frame of a decorative mill for your garden using four meter wooden blocks. Four bars should be used for the base and for the top of the structure being constructed. In its appearance, the structure should have the shape of a truncated pyramid with a base of 40x40 cm and a peak of 25x25 cm. We frame the lining with a lining. The overall appearance of the structure depends on how carefully the middle part of the structure is made.

Here we will use such a truncated pyramid as the middle part of our structure. Sheathe it best with the same clapboard, not forgetting about the windows and the door
The mill will look very elegant and beautiful if you make decorative windows, doors or even balconies in its middle part. Such and other decorations will give the building an individual, unique look. The finished pyramid can be strengthened on the prepared base with bolts and nuts. You can, of course, fasten the structure with screws or nails, but then the structure will turn out to be non-separable and in winter it will be more difficult to find a place to store it.

The mill, made on the basis of a five-walled log house, also looks very attractive. Choose from different options the one that suits you best
It remains to build the roof of the mill, which, like a hat, will give the construction a complete look. For the roof, two isosceles triangles with dimensions of 30x30x35 cm are required, which are connected to the bases by three wide boards, and on top by bars (60 cm).
In order for the structure to be stable, it is possible to connect the base and the roof of the frame with each other using a vertical axis, pressed into two bearings. Such an addition will allow the mill roof to rotate freely. You can cover the roof with galvanized iron and the same lining.
Stage # 3 - horizontal and vertical axis, sail
A metal rod is required for operation. A hairpin with a length of 1.5 meters and a diameter of 14 mm is suitable. The vertical axis, having a thread along the length of the entire frame (about 1 meter), must be secured from below and from above with nuts and washers. The axis is mounted in the middle of the base of the roof and in the center of the lower part of the frame. The mill needs a vertical axis so that its “head” can turn “into the wind”. How this rotation looks from the side can be seen in the video.
The horizontal axis is attached in the same way as the vertical axis. She will need a rod about 40 cm long. The horizontal axis is located above the center of the vertical. The axis must pass through two boards with bearings: it pierces the roof through, passing parallel to the ramp. The bearings themselves must be mounted in the central part of the board. To do this, use clamping bolts that pass through the board and pull the hole for the bearings. The blades will be attached to the resulting axis.
To build a mill that looked like a real one, you can make a steering wheel for the wings. He will pick up the direction of the wind. Such a rudder-sail is made of two wooden trapezoids, a board between the bases and the central axis. The sail should not be heavy, therefore it is better to beat it with plastic or galvanized sheet. We fix the steering axis to the roof base with a self-tapping screw from the side opposite from the propeller.

It looks like a mill with a sail, which balances the design of the wings and is used to search for wind in case you are making a rotating model
Watch the video, and it will become clear to you for what purposes some structural elements were needed. In principle, you can refuse a lot if you just need a decorative mill that will not rotate, but simply decorate your site with its presence. The current model will require a lot of effort, but it looks much nicer.
Stage # 4 - building a spectacular turntable
A pinwheel is a very important part of a design that can decorate it or, conversely, spoil it. It should be remembered that the wings of our mill should not be too heavy. We take for the blades two boards 1.5 meters long, 5 cm wide and 2 cm thick. We pre-cut the grooves in the middle of these boards. When crosswise overlay blanks, the grooves must enter into each other. We fix the joint with bolts.

The general principle of operation of the wings of the mill is no different from the rotation of the blades of a children's pinwheel: they are made in such a way that the force of the directed wind presses on the wing
Each of the resulting blades serves as the basis for wooden planks. They should be nailed so that each of the wings resembles a trapezoid in shape. We fix the finished propeller-propeller on the horizontal axis. Please note that the spinner and the steering wheel must balance each other. Now that the installation of the roof with the steering wheel and vanes is completed, you can cut off the excess part of the horizontal axis.
Stage # 5 - decorating the finished structure
As mentioned above, the design can be rotating or stationary. One model will be more spectacular, another simpler, but even the simplest decorative product can be made beautiful and worthy of attention and all kinds of praise.

See how even simple mill models can be made truly beautiful and attractive. Take on the ideas embodied in these products

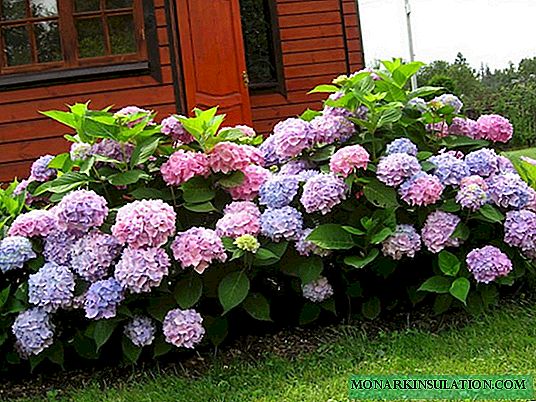
For this mill, blooming jasmine and a neat lawn create a wonderful background that perfectly shades the decorative elements of this wonderful model.
How and how to decorate the finished structure?
- Paint the mill and varnish the wooden surfaces. The wood itself is beautiful, but if you want to do something special, you can use paints of different colors.
- Do not forget the window and door. Their presence is interestingly played out, for example, with the help of carved platbands or frames of contrasting color.
- Garden lanterns placed inside the mill under its very windows will make the product even more colorful in the dark.
- Cute flowers around the building can also become its decoration, if they are not too tall. It is better to choose ground cover plants. Moreover, they are just at the height of fashion. An excellent background for the model is a decorative shrub.
The decorative mill, made with love and diligence, decorates any site very much and, unfortunately, is able to attract the attention of not only admiring spectators, but also country thieves. Think about how exactly you could make its removal from the site impossible. For example, you can dig and concrete a metal pipe on which to subsequently build the base of the building. Let your wonderful work please you and your guests for many years.